Tuesday, August 30, 2011

Curtain Face Lift-Tutorial

The curtains in my master bedroom were an IKEA purchase never intended for my master bedroom. They were a cheap fix for our unfinished basement windows because I was sick of seeing the mess down there when I would walk out on my back lawn. I ended up getting one more set than I needed and realized that their goldish color matched a goldish accent in my bedding...
You can see the goldish there, on the pillow, do you see it?


So, I hung them up, again, as a quick fix...
And there they have stayed for months and months. Enter this little find...
I loved this fabric and had a 40% off coupon so I got several yards of it, not having a clue what I would do with it. And there it stayed, in the bag, for weeks and weeks. Then one night as I was trying to fall asleep (I say trying because my brain does not seem to have come equipped with an on/off switch) I had a thought. Dress up those boring 'ol IKEA curtains with that fabric I love. This made it really hard to go to sleep. I had to fight not to get out of bed, turn on all the lights and get 'er done! When I found the right moments (not in the middle of the night) this is what I did:
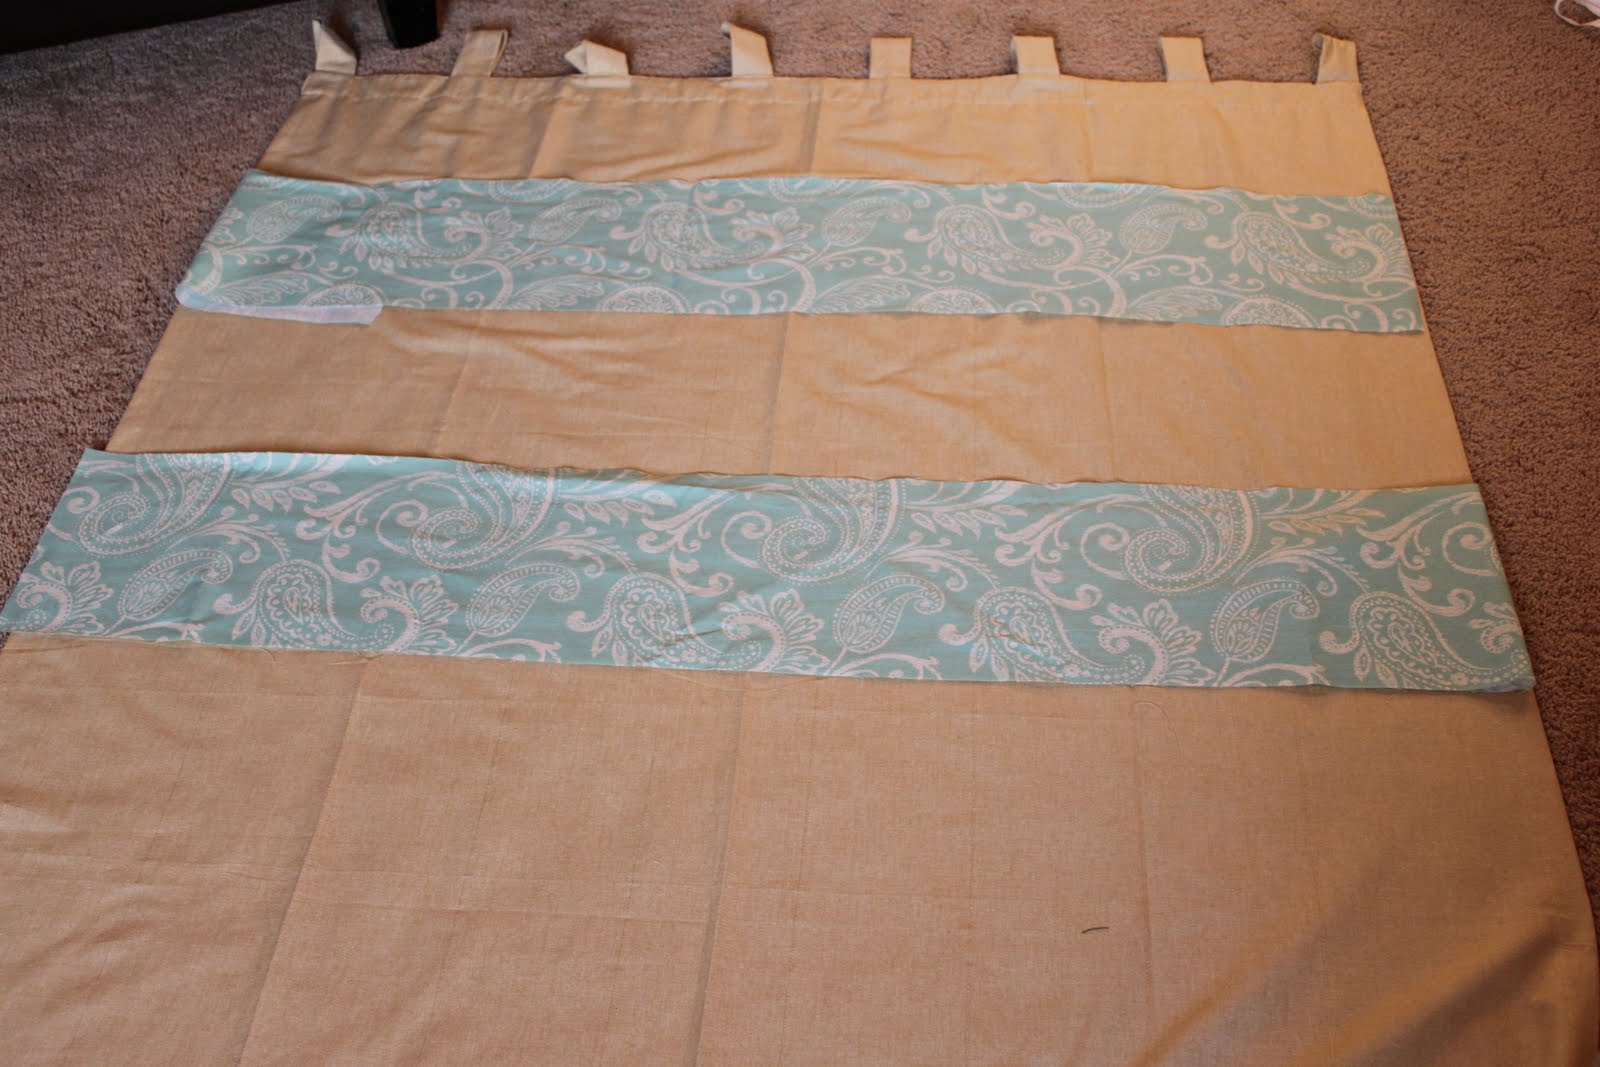
First, I cut two 10 inch strips out of the fabric and laid it across the curtain that I had taken down and laid out on the floor. I decided I liked how it looked so I started cutting the curtain apart, to sew it all back together again, of course!
I measured 13 inches from the top of the curtain (not including the tab top) and cut clear across the curtain.
Then I sewed one of my 10 inch fabric strips to it, right sides together and used a 1/4 inch seam.
 
I measured another 10 inches on the curtain, cut it clear across the curtain and sewed it to the bottom of the strip of fabric. I then added another 10 inch strip of fabric and then sewed the bottom of the curtain back on.
I pressed all my seams open with an iron.
I had to hem the curtains at the bottom, since this made them longer, but that just took a few minutes.
I love the color and also the design of the fabric that adds so much to the room. If you can sew a straight line on a sewing machine you can do the same with your curtains. NEVER hesitate to pick up a fabric you love even if (especially if) you don't have a clue what you will do with it. It will come to you...if not when you are trying to fall asleep, then surely when you are in the shower.
Another favorite way to make curtains that takes very little sewing ability: GROMMETS. These kits are available at fabric and craft stores and are so, so simple to do. Store bought grommet curtains are very expensive and while buying raw fabric is not cheap, use your 40 and 50% off coupons and you will be able to get them for much less than you would pay for store bought curtains. Plus, you can turn any fabric you love into the curtains you love!

I have linked up to a few link parties.
The Lettered Cottage

Labels: ,

Thursday, July 28, 2011

Canvas Covered Books Tutorial

Wandered around Restoration Hardware several months back, and got inspired! (Wish I could say I bought something but, wow...no). I love their amazing decorating sense, so simple and classic. Earthly, woody, and booky. Yeah, booky...several of their staged sitting areas made me feel smarter just sitting in them with atlases, globes, maps, and books.They have been doing 'vintage' way longer and way better than the lot of us (albeit not as cheaply).
And I just love what they do with books! You can't see it very well in this picture but there is a stack of books, covers ripped off and secured with rope or jute. I put my used paperbacks that I don't plan to read again to good use to create the same effect, but I used more of a gross grain ribbon I had saved off of Pottery Barn packaging from a recent purchase.
 Covering the books in canvas, or duck cloth, has got to be my favorite though and so I gave it a go.
 I really liked how they turned out.
I was about to create a tutorial to share with you how I did this...but then I thought, I bet someone has beat me to it, so why reinvent the wheel, right? Sure enough I found it, at a site I happen to love already and suggest you bookmark it to. Click here to watch the tutorial.
As always, if you are not having a, 'heck yeah, I'll give that a try' kind of day, I offer them up already done for you.


Amount of Books You Would Like


Labels: , ,

Monday, July 18, 2011

Robin Accent Pillow-Tutorial

I recently designed and made this very simple accent pillow so I wanted to share how I did it in case you get a hankering to add just that right touch but still KISS. You know...Keep It Simple Sister! I LOVE the simplicity of things and this surely fits the bill, not just in the look of it, but also how simple it is to make!
To start you will pick your fabrics. You might remember my post awhile back about fabric that I love. I drew on those again of course. I used muslin for the front of the pillow and an ivory broadcloth I got at IKEA. 
Here is the broadcloth on top of the muslin. I lined them up on top of each other so I could cut them at the same time so they were exactly the same.
 I used a ruler to mark where I wanted to cut the fabric with a pencil. The measurements I used for my pillow were 9 inches by 13 inches, but you can make yours any size and dimension you want! Once I had it cut (remember I kept both fabrics on top of each other and cut them at the same time) I ironed it so I had a nice, flat piece of material to work with. I took just the muslin piece and applied the stencil to it, placing it approx 1 3/4 inches above the bottom of the fabric and approx 2 1/2 inches in from the right side. You can use your own stencil or you can buy this robin one below for $4.
Once I was sure I had it where I wanted it, I pulled off the masking cover to expose the stencil.
 
Then I painted. I used simple acrylic craft paint. You can add a fabric medium to the paint if you want, but I did not find this necessary since I will never do more than spot clean this pillow. I used Delta Ceramcoat #02650 Tahiti Blue. (No, I did not spell that wrong, it is Ceramcoat, I have always read it Creamcoat! Ya learn something new every stinkin' day!) Make sure you put a paper plate or other protective covering over your work space (my husband wishes I heeded my own advice all the time!)
Once it was dry I pulled the stencil off and then let it sit and dry some more. You don't want to work with this until it is TOTALLY dry!
Now comes the sewing! You will want to use a sewing machine for this, if you can thread your machine you have done the hardest part. You are just going to sew straight lines. You will now place fabric pieces together, wrong sides out. Using a 1/4 seam I sewed all four sides of the pillow, stopping about 1 1/2 inches short of closing it up. I used this hole to turn the right side out and I used scissors to push out the corners. 

Next, using polyester fill you want to start stuffing the pillow as full as you can until you get a shape you like. I again use scissors in the hole to push filling into the corners. I stuff it until it is a shape I like. Here it is almost full with a little fill coming out the hole so you can see what it looks like. This fill is available at every craft/fabric shop and also Walmart and Target type stores.
Once you get it stuffed to your liking, thread a regular needle and hand stitch the hole closed. Use the exact same color thread as fabric so you cannot see the stitching.
Tie a knot at the end and trim strings.
There you have it! As you can see, I have made a few extras! I promised at the beginning of this blog I would help you do it yourself when you were having one of those confident, 'I can do this' days! If that day is today for you, have at it. If you would like to purchase the stencil, see below. Just $4 with FREE SHIPPING! 
BUT, if today is one of those 'I have been searching design blogs all day and I am overwhelmed and just want someone to do it for me' days I promised I would help with that too...so complete pillows are also available for purchase below.
Robin Accent Pillow


Robin Stencil in Vinyl


Labels: , , , ,

Wednesday, June 15, 2011

First Tutorial: Beach Art

OKAY...time for my first tutorial...wish me luck! This is really basic, thought we'd start easy. I am going to show you how I made a beach sign for my kids' bathroom using vinyl lettering as a stencil. 
First, I prepared my wood. You can choose from almost any medium for this project wood, fabric, metal. I used some more of that old wood crate you have heard me mention before. I sanded it down, nothing too intense and then whitewashed it with basic white house paint (handy to have a bucket of this around, I use it all the time for projects).
Next, I applied the vinyl. When I created the vinyl I made it to be used as a stencil, which means I took the letters out and left the negative image. Vinyl lettering comes with a paper backing that needs to be peeled off. There is masking (looks like a huge piece of masking tape) on the front that will keep everything together as you pull off the paper backing:
Then, I flipped the vinyl piece over and stuck it to the board. I rubbed it down onto the board with my fingers so it would stick and started pulling the masking off. You can see my whitewashed board through the letters.
Next, comes the spray paint (love spray paint!). I used this guy:
And it looked like this when I was done. I did not want deep coverage, I wanted the wood grain to show through. Yes, my husband LOVES what I have done to the garage floor!
Once dry, I removed the vinyl all in one piece still. And voila! 
I let my daughter pick the saying, since she loves the warm beach (as opposed to any beaches we live near which are very cold), I am doing the bathroom in a beach theme to help her feel more at 'home'. This sign is 12 inches tall and 35 inches wide. The vinyl to do a project this size on your own would be $22. It can be customized to say anything you want, or it can also be a graphic. Shoot me an email at amber@pineplace.com if you would like to go for it!
 I am not ready to show the sign in context yet as I am still working on the bathroom, which presently looks about like this:
 Nice and BLAH!!!!!!
Bathroom redo reveal coming soon!

The Lettered Cottage

Labels: , ,